The Perseverance Rover will attempt to ‘softly’ land on Mars later today. This is a routine that’s been tried in many ways and unfortunately has only had around a 50% success rate. Of course, we hope that through past failures we can achieve future success. Here are the Live Feeds for the landing, which starts around 1915 UTC.
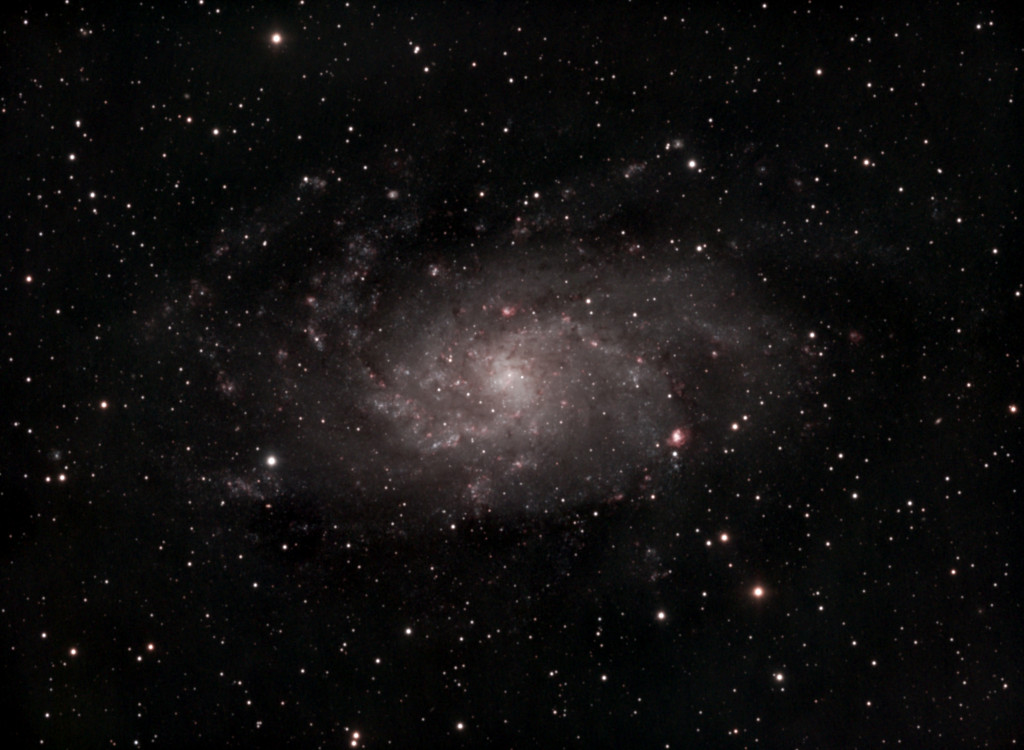
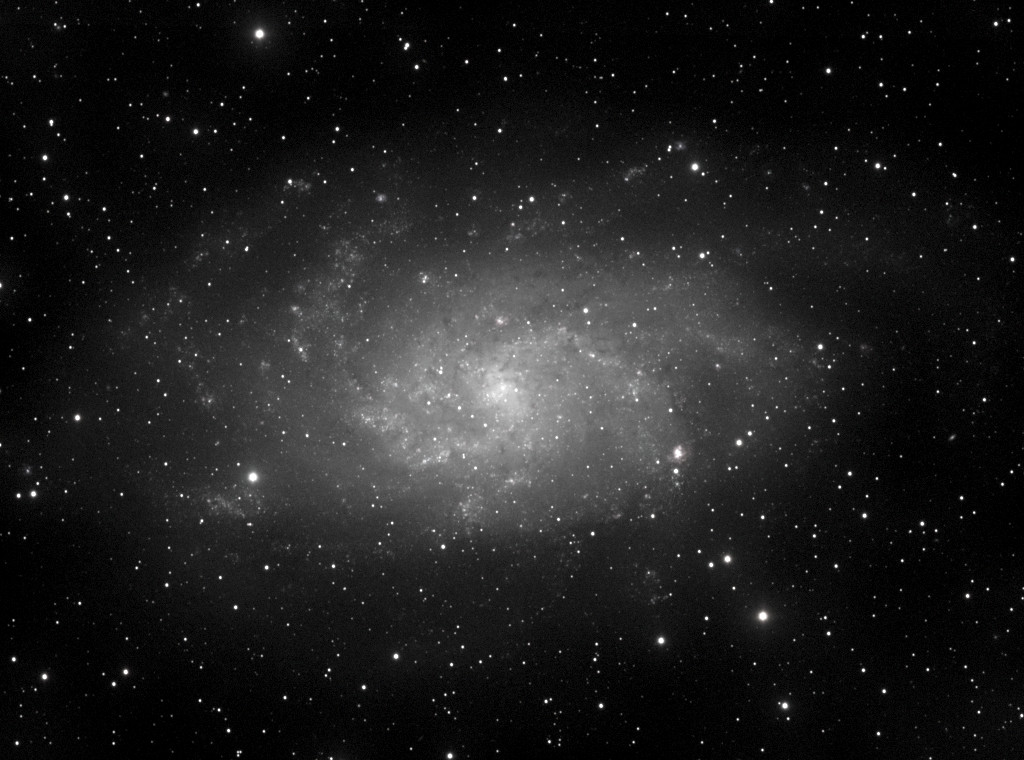
I continued to grab more data for M33, and have added the Hydrogen Alpha in a slightly different way to before, although I wasn’t able to get any more sub-exposures for Hydrogen Alpha due to software issues. Still think I need to continue to add more data.
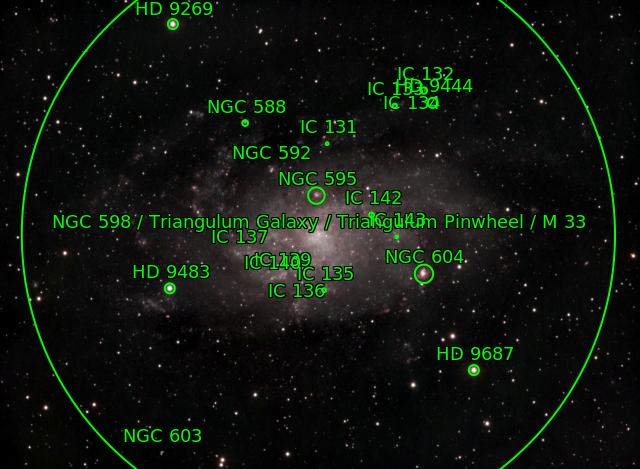
Annotated Image
Focusing is actually working well now, although the focuser appeared to want to refocus far too often. Guiding was also being suspended during focusing. I think we will now manually move the focuser to 83000 steps at the beginning and probably limit travel to 1500 steps in either direction or so, and work with much smaller initial steps (initial step 200, max step 300). This should allow me to refocus often and quickly and not have to suspend guiding during focusing, which appeared to be an issue. I am hoping some Kstars updates to Astroberry in the near future will sort some of the software issues I have experienced last night.
Have managed to get some more data for the M33 image on the 24th December.
M33 Triangulum Pinwheel
We are now seeing some colour detail from NGC604.
Had some difficulty running from mains, seemed to trip out and reboot the Nevada PSU. Managed to overcome those issues by switching to the SkyWatcher Powertanks. I think I will have to look at a high-density LifePO4 battery. Also had some issues with the GPS detection, which might have also been rooted with the power issue.
UPDATE 29/12/2020
The issue with the PSU is that the PowerBox Advance does state it needs 10A power, I looked at my PSU and it can output 6A continuous (8A surge) – via the binding posts, and max 5A via the cigarette socket. I checked my cables and found that while the PowerBox only appeared to be drawing 2.7A for all the kit it must have been surging at times. I also found that in the length of cable from inside mains to the outside I had cigarette plugs with 5A fuses. I am now in the process of getting an upgraded PSU rated to 10A on the cigarette socket and have found a 10A fuse to use, the PSU also has a 25A-30A red/black binding posts at the back – which should suit me for any future requirements I may ever have. It also has adjustable voltage from 9-15 VDC, so I should be able to crank up the volts a little if necessary due to the cold. The PowerBox can accept 13.8V and will protect trip out at above 14.5V. The issue with the GPS seems to have been that I located it at the back of the Argon One M.2 case, and there must be some electronic or radio interference in that location. I have now been testing semi-inside with attaching the GPS mouse with Velcro to one of the Tripod legs, and when not in use I can use that Velcro strap to wind in the cable and just store the GPS mouse in the location I had hoped to be able to use it from.
Here is a recording of the Live Stream of the capture, you might want to switch it to HD for viewing and then perhaps skip through playing at x2 rate. When switching to the second power block
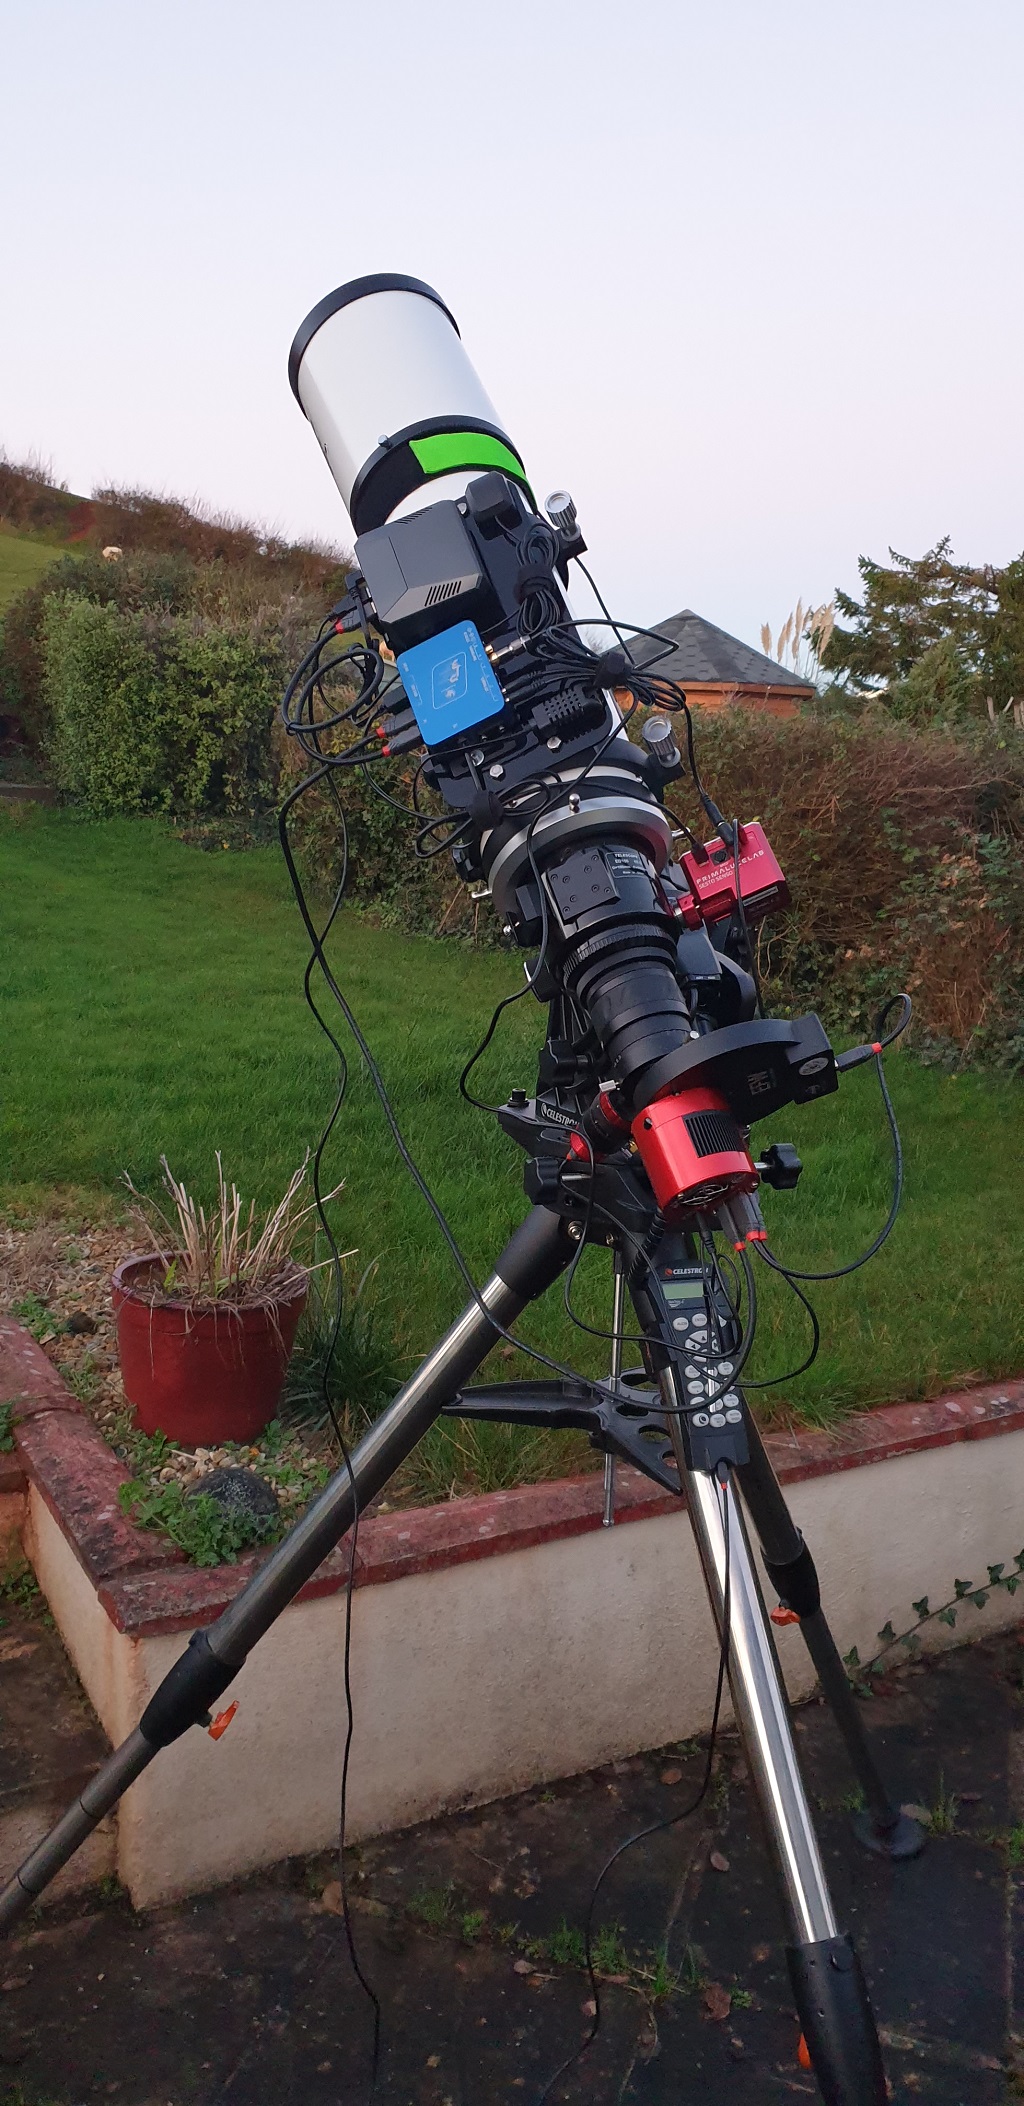
Here is a picture of the rig, almost completely set up – I think we just needed to run the power cable at this point. We still have some cables on order which will shorten some of the lengths and improve the cable management, but this is a lot better than the mass of cables I had running before.
In order to control the number of cables and perform some cable management we often mount equipment onto the telescope mount. This is commonly done by mounting an additional plate onto the tube rings of the telescope. These plates can be heavy Losmandy D-types. Here is a solution I found using some 3mm Perspex, which can be easily ordered online from plastic sheeting companies. I drilled a few holes into the sheets and mounted my equipment onto the sheet, which I attached to the Esprit’s tube rings.
This is a video showing how I cloned my old SSD from “The Box” to the new M.2 SSD housed in the Argon One M.2 case. A New setup is easily achieved by following the instructions on the Astroberry website and using a tool such as the Raspberry Pi imaging softwarae.
So, just a video that looks at the Pegasus PPBA, and how it will go with the RPI4, replacing “The Box”, but providing us with some extra functionality:
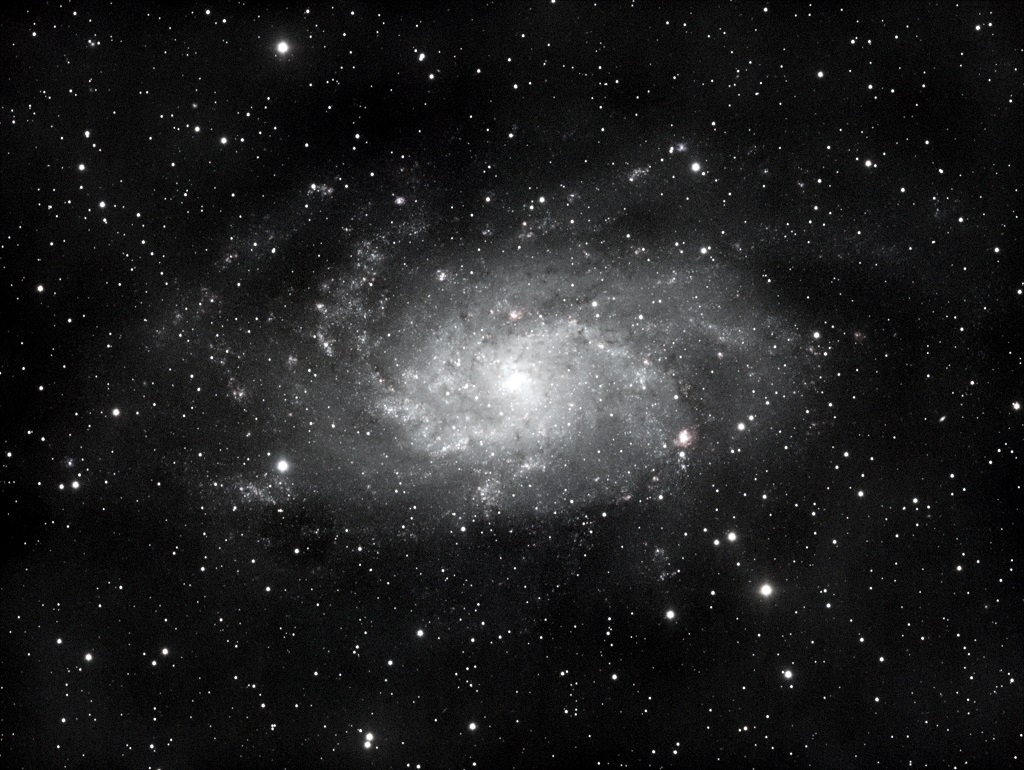
So, to start the Esprit Journey proper, we chose a simple, single frame target, which we visited before in 2019. The capture session was live, but here is the first draft of post-processing the data:
M33
This is clearly superior to the Startravel 120T!
Here is the capture session in progress, recorded live, exposure by exposure, I apologise for not being an active commentator, and lots of sounds in the background:
We don’t know, all I know is that it flattens the field to a image sensor, this is the SkyWatcher Field Flattener which is matched to the Esprit 120ED Pro, the main sensor is a CMOS ASI1600MM Pro in my case.
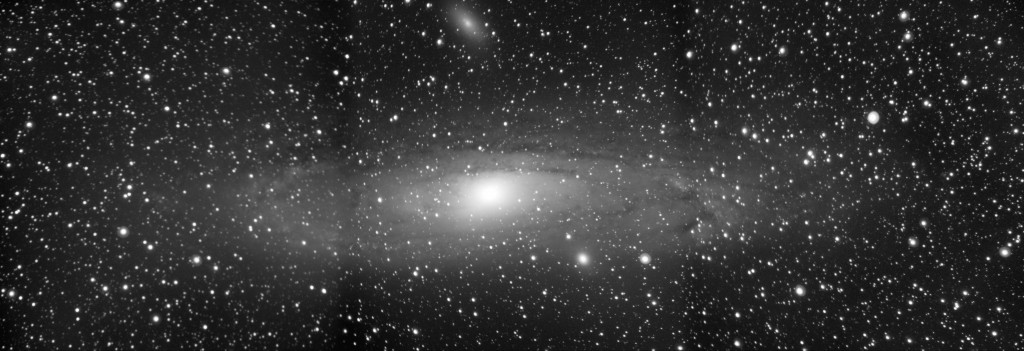
So we had a brief night of viewing, and as this is likely to be the last time using the StarTravel 120T I thought we would end where we started, with Andromeda. The results are not great, it is a Luminence only capture, with a mono camera, a mosaic of three panes, and you can clearly see the egg-stars caused by the chromatic aberration that the StarTravel exhibits. The StarTravel gets really good results with Narrowband imaging, but not when trying to get true colour. I intend this to be the first target with the Esprit soon, and hopefully we will see quite a difference to compare the two against each other – you need to be reminded that the Esprit costs probably around 8x more than the StarTravel, and everything I’ve posted here so far was achieved using the StarTravel. I have not bothered to perform much post-processing on this image, as I feel more compelled to focus efforts on new equipment, and hopefully better results.
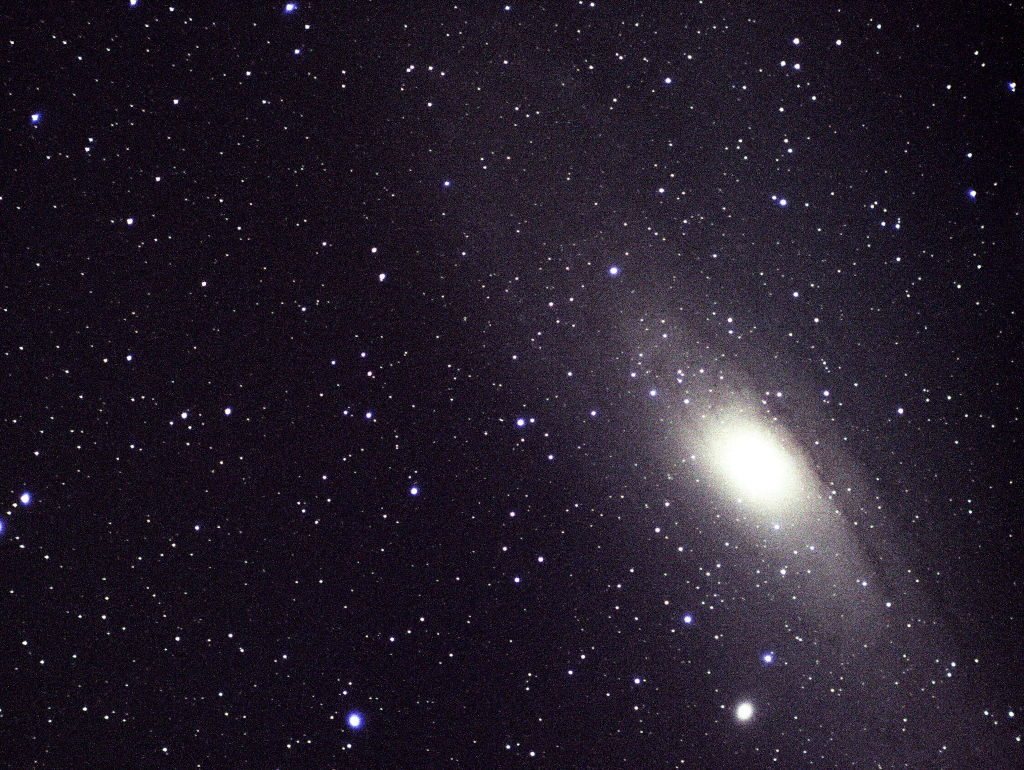
We can compare that, with my first ever astrophotography photo, although I believe this was LRGB at the time, so avoided the worst of the chromatic aberration by re-focusing for each colour filter.
This is just a quick video going over the Esprit 120ED Pro, together with the Sesto Senso 2 focuser, and comparing it with the StarTravel 120T with the SkyWatcher DC Motor Focuser.
And a quick look at the included accessories with the telescope
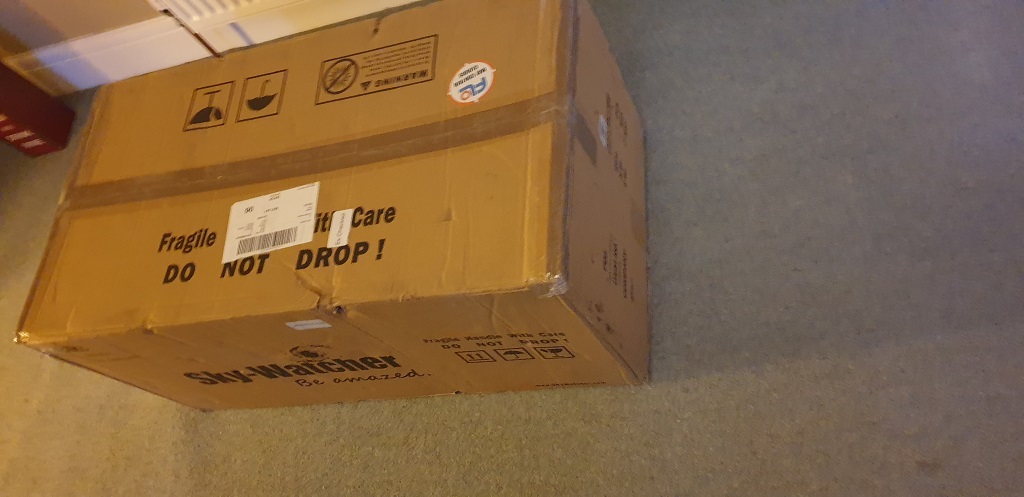
OK, Well the Esprit 120ED Pro has finally arrived. So a few unboxing photos, which I will follow up with a video comparing the upgrade from the Achromatic StarTravel 120T to this new Apochromatic scope, in particular testing out the Sesto Senso 2 on the Esprit, and comparing it with the DC Motor on the StarTravel.
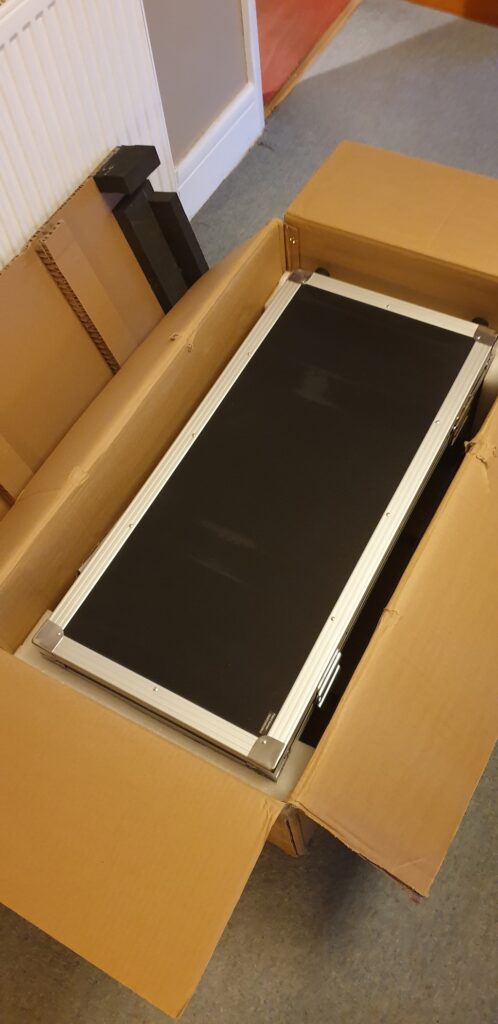
Above, the box it came in.
Feeling like Russion Dolls
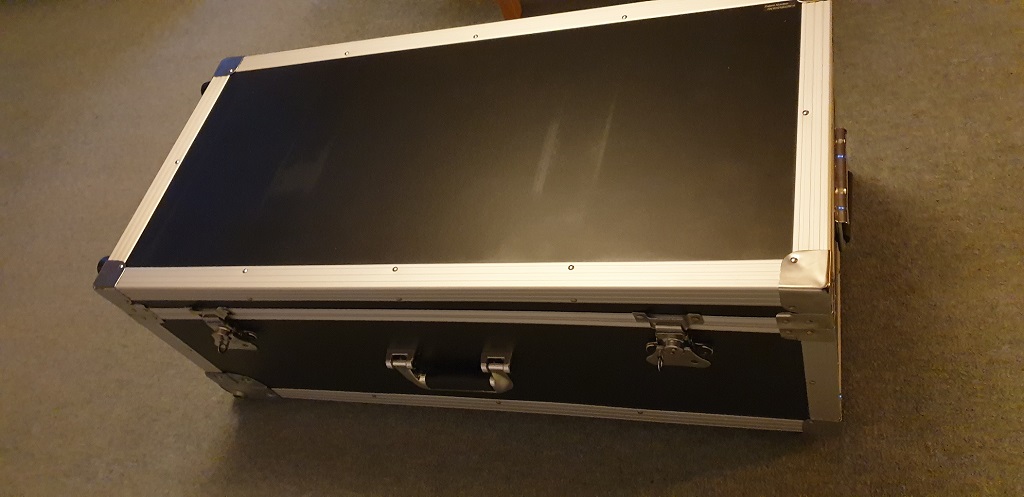
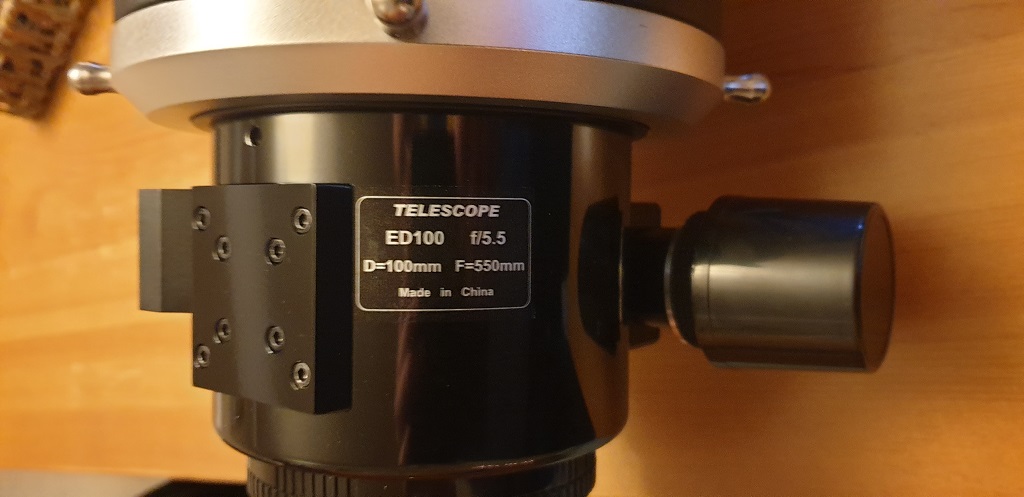
Now what might be inside this quality case.Looks like they used a ED100 allocated focuser on this 120ED
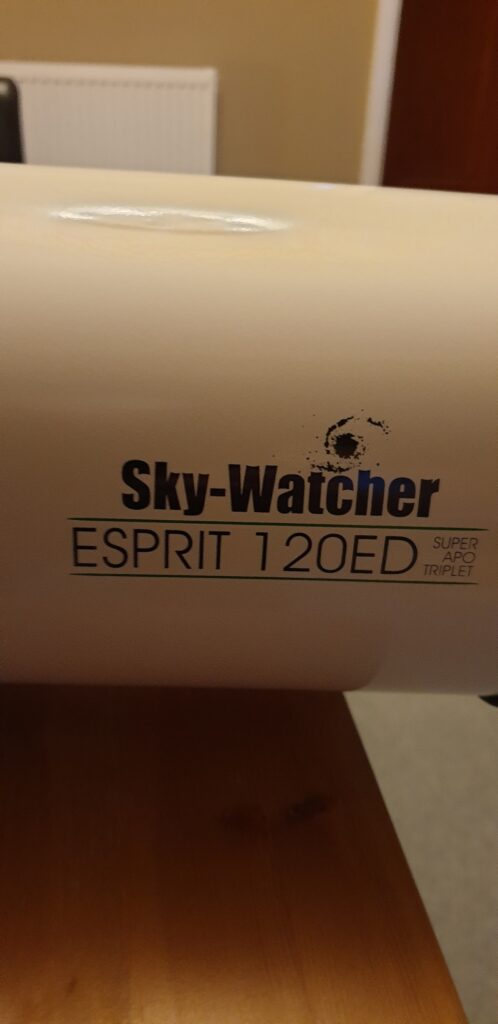
It is definitely a Esprit 120ED though
I am told that there should not be any difference between the ED100 and the ED120 focusers, they are the same model, the only difference is the sticker, which I will either remove, or it might drop off with dew in time.
This is a quick video to look at viewing equipment on our side of the focuser – diagonals, eyepieces, and looking specifically at the Baader Planetarium Hyperion Zoom MkIV eyepiece. Essentially how to avoid going down the route of eyepiece collection explosion, get a single eyepiece that adequately provides the views at all magnifications that your equipment can reasonably cope with.
We are looking at the SkyWatcher (or Celestron) PowerTank 17ah, for use at dark sky sites away from home, to provide a constant 12V, upto 10A power over 17Ah of powerstaoge.
Obviously neither SkyWatcher nor Celestron manufacture this product. Here we show what its form factor capabilities are, and I will update you in time with how they perform:
Another quick look at the IDAS-P2 LPS Filter, for suppressing light pollution at your imaging / viewing site. Also how it might fit into your imaging train, in advance of any other filters you might be using.
OK, so I took a delivery and this is the first look at the Primaluce Labs Sesto Senso v2, although I don’t yet have a compatible scope to attach it to. It feels sturdy, and without further ado, here is the review:
Just a note about the 12V power connector, my previous HitecAstroDC focuser accepted a 2.1 centre positive connector, and I hoped I would be able to use that. Unfortunately the Sesto Senso v2 power connector appears to be a 2.5mm centre positive connector, so you would need to buy another cable to get rid of the cigarette lighter cable that comes with the device.
So, an often discussed topic on online forums is what capture settings should I use, how much should I cool my CMOS camera, what exposure, and what gain. The answers to all these questions depend on your equipment and the amount of light pollution at your site. The following video was given at a recent Astronomy gathering by Dr Robin Glover, which gives a real insight into how far you should take the extreme possible settings of your equipment in order to optimise the gain in quality for the amount of pain and patience needed.
Towards the end of the video Dr Robin Glover ran out of time, but later posted the missing parts with relation to what gain settings are helpful in various set ups.
This is a quick video about “The Box”, the system I use that connects my equipment (via INDI), to my desktop indoors, and allows me to control everything without having to go outside. Although it is sometimes enjoyable to go outside and watch some of the automation tasks, such as a meridian flip!
Well, it is approaching retirement, and I will soon be presenting it’s replacement to you, I thought my old SkyWatcher StarTravel 120T, deserved a look at on my site.
I hope within the next month of so, to showcase the new telescope, although it is now not due to arrive until early November 2020.
During the focus procedure on Friday night, I seem to have captured what I’m going to call “Musk Trails”. I expect this was part of a constellation of SpaceX Starlink satellites traversing my field of view while I was trying to focus. Here is a still from the video:
So, I did make a screen capture of the session on the 9th October, it is not particularly interesting as I was not really commentating throughout, had my webcam flap down for some reason, but you will see certain aspects – we are using the new SEP multi-star algorithm in Ekos, which is great for stability, it does show off the AS290MM mini, it shows how I have to manually focus every so often (APO and SestoSenso arriving soon will be greatly appreciated).
I would not expect anyone to watch this five hour marathon through from start to end, although if you happened to be watching it live it might be interesting if you were acquiring the same target, but certainly skipping through the footage, you might come across something I’m doing wrong, or right, and have some comments on my progress in this field.
Don’t expect so see the thumbnail in this video to appear in the video itself, this is the acquisition phase of individual sub-exposures, I will post a video on processing of the data, including this night’s, in a later video, when we’ve hopefully improve on the data substantially. The preview picture displayed is the accumulation of data so far, without any discarding of bad data so far.
I do have to wonder, how I will proceed when the APO arrives, it is a f/7 telescope, while these are taken on a f/5 telescope. Maybe I can proceed with a 3×3 mosaic, or something similar 3×2 or 2×3 and add to the data, or perhaps I need to choose to start all over again. APP will help when I start, as it will quantify the quality of the images I already have, and be able to merge frames from different optical equipment.
As always, if you are here as a genuine viewer with an interest in Astrophotography, then please leave a comment, I will moderate and reply if necessary.
We use cookies on our website to give you the most relevant experience by remembering your preferences and repeat visits. By clicking “Yeah Yeah Whatever”, you consent to the use of ALL the cookies.
This website uses cookies to improve your experience while you navigate through the website. Out of these cookies, the cookies that are categorized as necessary are stored on your browser as they are essential for the working of basic functionalities of the website. We also use third-party cookies that help us analyze and understand how you use this website. These cookies will be stored in your browser only with your consent. You also have the option to opt-out of these cookies. But opting out of some of these cookies may have an effect on your browsing experience.
Necessary cookies are absolutely essential for the website to function properly. This category only includes cookies that ensures basic functionalities and security features of the website. These cookies do not store any personal information.
Any cookies that may not be particularly necessary for the website to function and is used specifically to collect user personal data via analytics, ads, other embedded contents are termed as non-necessary cookies. It is mandatory to procure user consent prior to running these cookies on your website.